Hi there! Today I have a layout and a tutorial to share, and I have used one of my fav Dusty Attic chipboard pieces – the Vintage Frame (DA0254)!
Here’s my layout, it is me and one of my sisters in this photo. I have three sisters and they are all very special to me.

Before I share my tut on how I painted the frame, I have lots of close-ups for you:

The Mini Bicycle (DA1004) is embossed with Mix’d Media Inx, colors Honey and Leather.
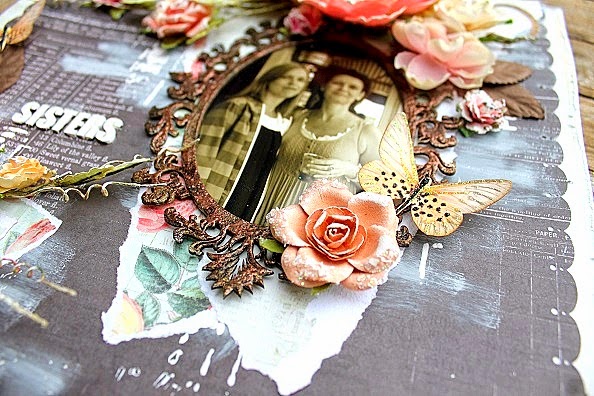

For my title, I used Mini ABC Set Upper (DA0861). I just painted the letters white.
The gorgeous butterflies are from Reneabouquets.

A closer look at the frame:


And now for the tutorial on the Vintage Frame. I actually had no clue on how this would turn out when I started, so if you find the steps confusing from time to time, it’s just me playing and having fun! And that’s what art is about, isn’t it? Having fun!
So here we go!
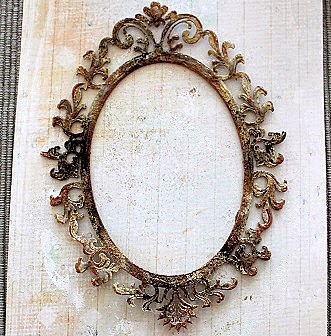
This is what I started with:
The Vintage Frame, white gesso, Mix’d Media Inx Embossing powder (color Leather), Dusty Attic in colour: Vintage Gold and Clear Gloss Varnish.

I first painted the frame with white gesso:

I then painted with Dusty in Colour, Vintage Gold, using a sponge.

Before the paint had dried, I put some embossing powder on, just here and there:

This is what the frame looked like after heated. The wet paint under the embossing powder gave some extra texture:

When this powder, color Leather, dries, the color shifts from dark brown to bronze – cool!

I wasn’t satisfied with the result, so I took out some mists, Heidi Swapps Gold mist and Smooch Spritz, color Evergreen. But before misting, I applied Clear Gloss Varnish here and there, and let it dry before misting:

I sprayed the frame with the mists, and wiped some of the ink off using a napkin:
Still not satisfied, I put on more Leather embossing powder:

fter heating, the framed looked like this:

From a different angle:

As a final step, I misted with the Smooch Spritz one more time, on a few spots, and then wiped away some of the ink:

This is the final result, and I really, really love this look! It looks aged and with lots of texture, just the way I like it 🙂

I hope you like this too, thank you for stopping by today!
Helena xox

I love it! Thanks por the tutorial. The layout is very beautiful, congratulations.
Kisses from Spain.