Welcome!I’m very happy that I have time dedicated to you again. Each subsequent entry reveals something I had not realized so far. Well, all my life I thought that I was not suitable for a written message, that it was boring and what is most strange, I was convinced that I did not enjoy it. Meanwhile, once again, I had barely finished my creative work, I couldn’t wait to describe it all to you. And I do it with great joy!
I just finished an assignment for my lovely client who has been loyal to me for three years. I like her orders so much, because she’s a person who knows exactly what she expects, gives me specific guidelines that she cares about, eg style, color, some specific theme.. Then we set the texts and the rest is on my side. I can go crazy, because the ideas are always ahead, although sometimes I have to do my best to meet her expectations. This time it was supposed to be in a retro style, with a very visible reference to music and romantic, as it is a wedding gift. Here’s what I came up with:

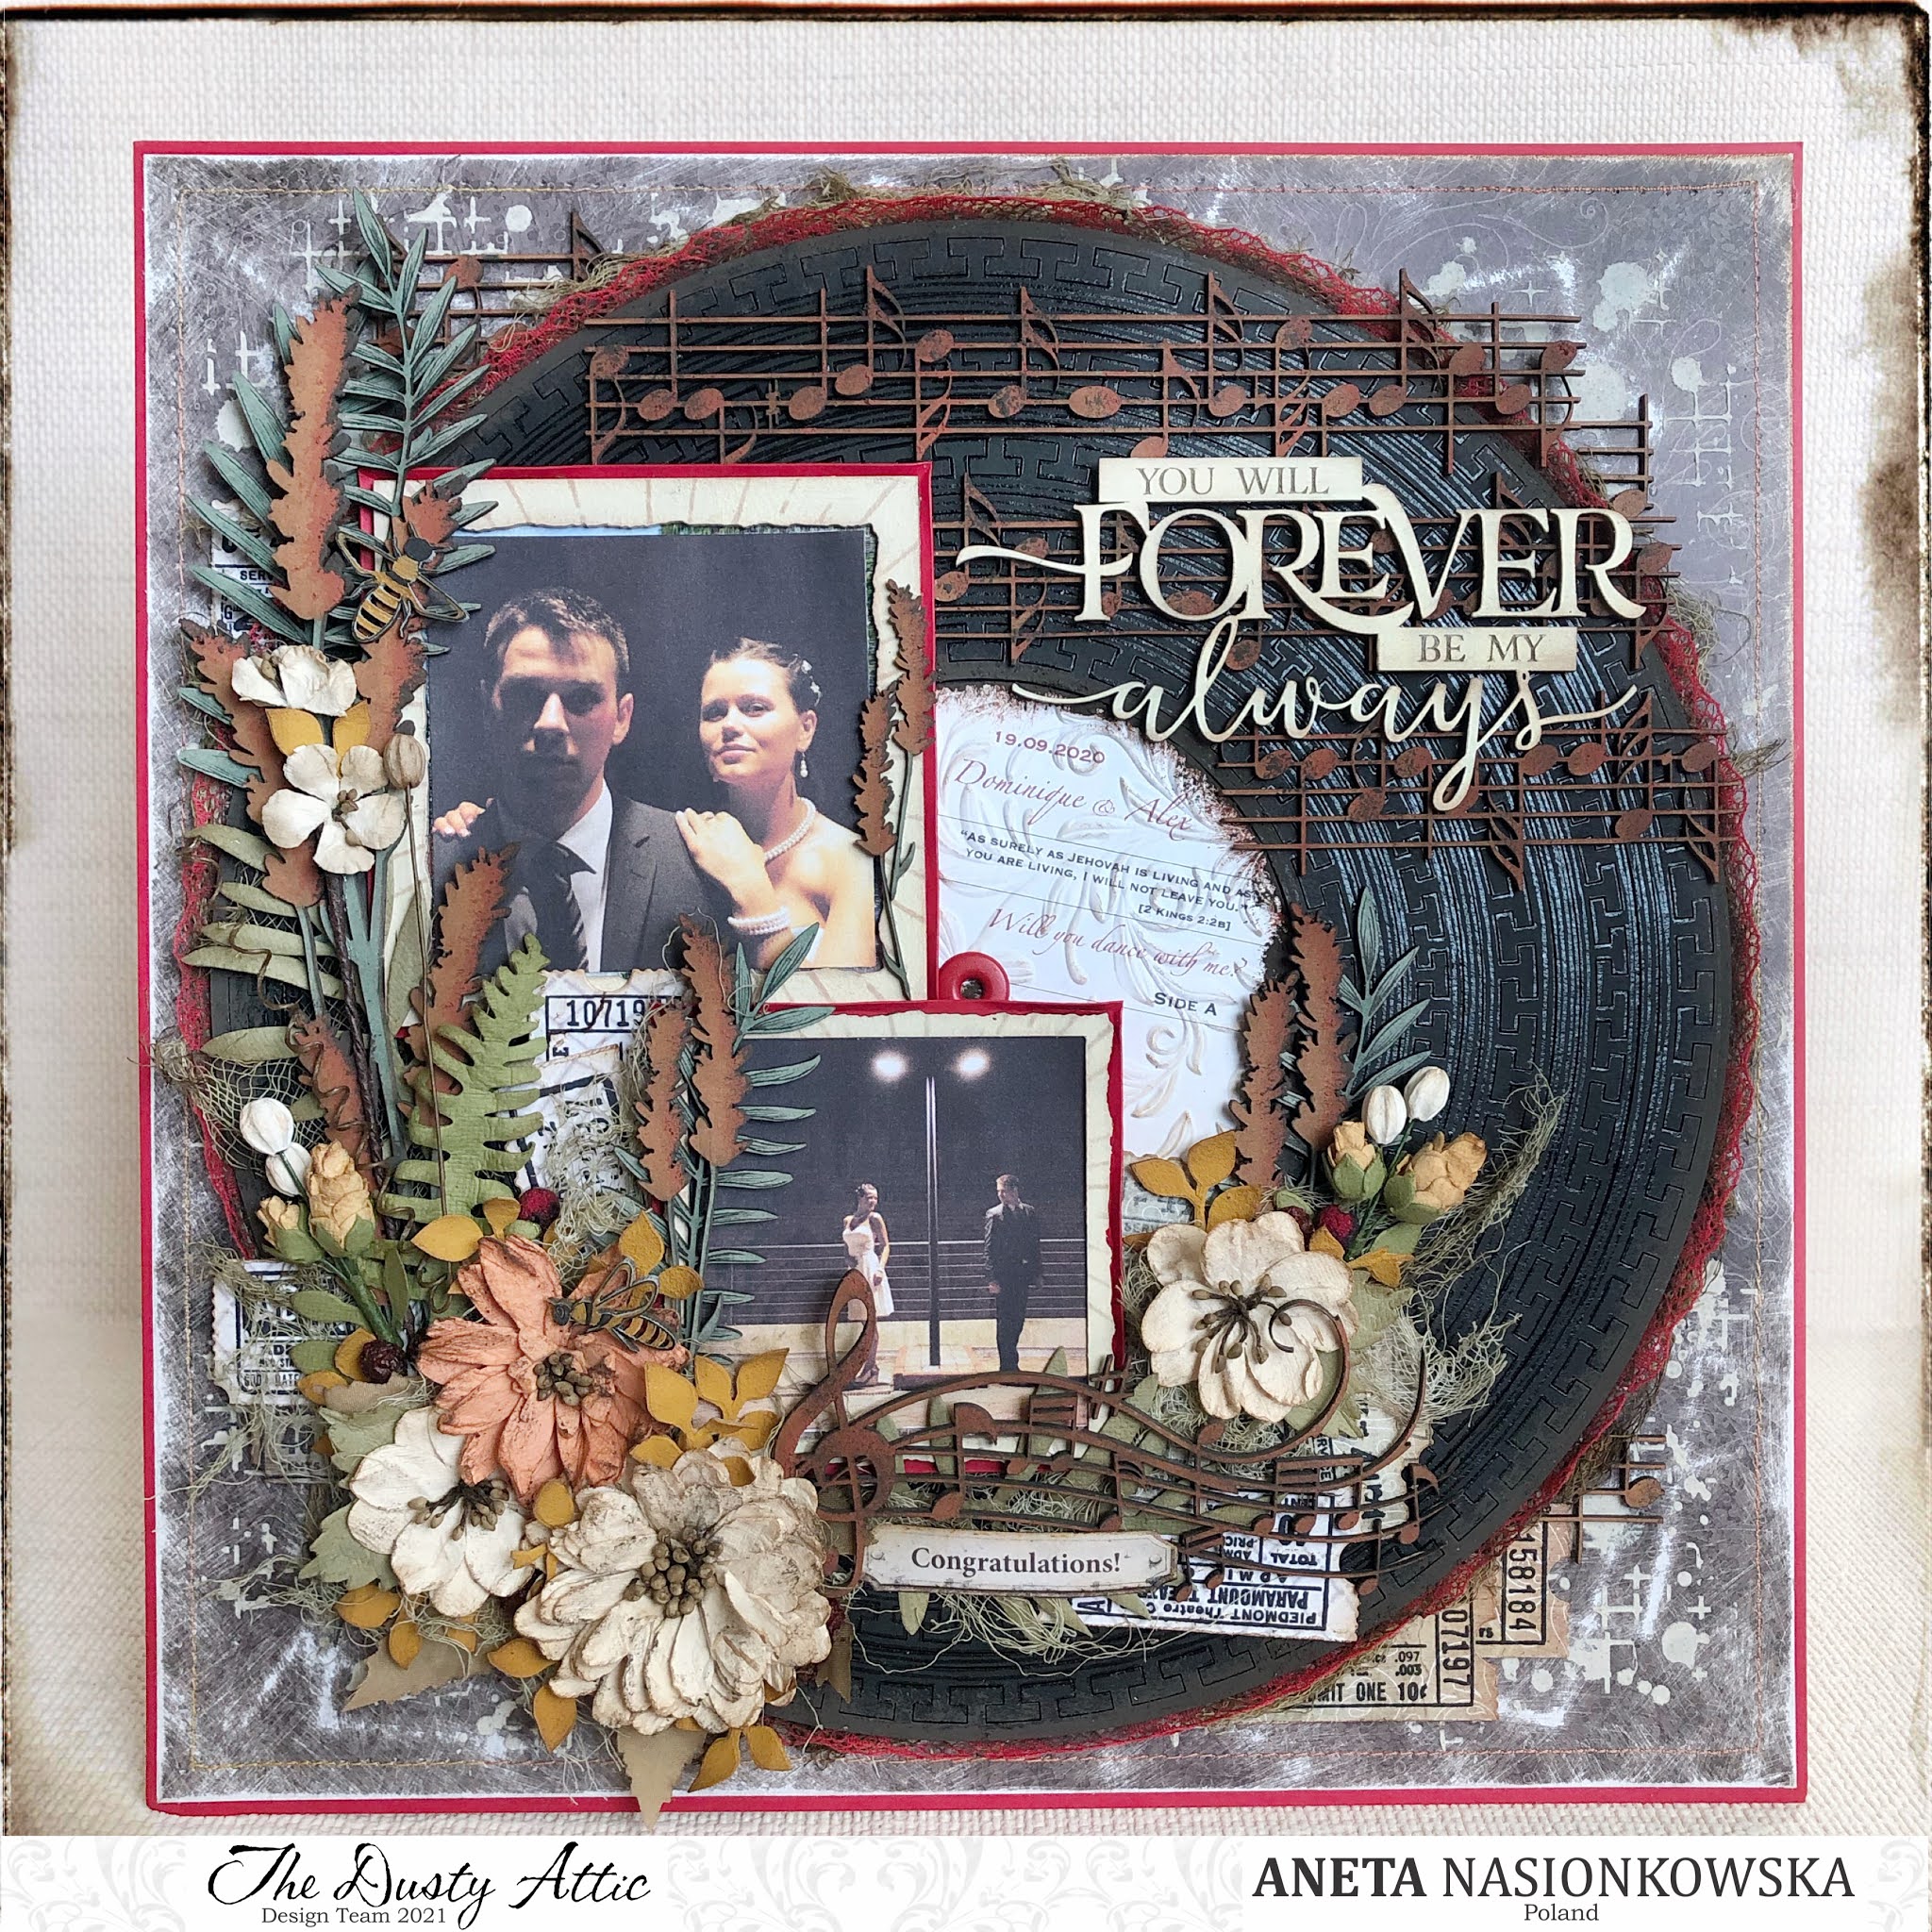
I started with the preparation of the base. I used a brown sheet from the “Breeze of dream” collection by Margaret Paper Design. I rubbed the edges with sandpaper and covered it up with Distress “vintage photo”. Then I sewed carefully on the machine, making sure that the sewing was straight. With sandpaper, I rubbed the white lines on the paper and over it I put on the “Distressed Grid” mask from Dusty Attic. I taped the sheet from the bottom with red paper to obtain a thin frame around the design and stiffened the whole with a 30cm x 30cm beermat sheet.


An important element of the project is a vinyl record that I made from a set of frames. I painted them with a black gesso, and then using the Sakura Glaze pen to emphasized the joints of the chipboards, which I intend to imitate the grooves on my record. The edges of my vinyl record – inside and out – have been treated with a brown finish with a rust effect from Finnabair. From the bottom, it is glued with red lace and underneath it is a torn gauze, which I colored with an espresso-colored Ranger mist. The whole piece underneath is lifted on pieces of cardboard for a 3D effect and is thus glued to my base with a heavy body gel. The center of the disc contained information for the bride and groom is cut with a metal die. I used a 3D embossing folder from Sizzix, a Distress coating (vintage photo) and a brown paste with a rust effect on the edges. In the middle I mounted a red rivet – a very useful tool for this is the Crop-a-dile.


The project includes two photos. I placed them in frames from the Distressed Square set. The frames are painted with antique white Art Deco acrylic paint. On this I applied a pattern from the Sunburst mask, with vintage photo ink. I glued the photos from the bottom with the same red paper to form a border around them. A complementary theme to the composition is a set of retro-style tickets, made of stamps and Sizzix’s “Ticket Booth” dies matched to them. To make them, I used the remnants of papers from the same “Breeze of dream” collection that had left from my previous project. The edges got inked.

Another important point is the preparation of chippies. I hesitated between dirty blue and orange. When I hesitated so much, a package from Craft Stash came to me with the mentioned rust effect pastes. I had to try them and that’s it! As long as I don’t have something, I live without it, but when I get it, it suddenly turns out to be irreplaceable .. Do you have it too ?! :)) So the decision made itself. I painted the notes on the top and those with a treble clef and lavender heads with Promarker in the shade of Spice, then I applied the mentioned pastes from the right edge: first orange and on it a thin layer of brown. The effect is amazing!


The composition around the photos consists of chipboard leaves, the aforementioned lavender, three sets of flowers from 49 and Market, rowan dried in autumn, espresso-colored gauze and leaves made according to my own idea using the mask that I wrote about in the previous post (click). This time I made them out of golden rust. Chipboard leaves are coloured with Promarker in a shade of Soft green and innervated by hand with the Faber Castel XS marker. Bees are an absolute hit for me, they are gorgeous! I painted them with Faber Castel pens: orange glaze 113 and black 199.


The last steps are preparing the subtitles. Here I used a beautiful chippy wording: You will forever be my always. I painted it with antique white acrylic paint and smeared it a bit with vintage photo ink. The inscription Congratulations comes from the aforementioned collection of papers, I got the edges dirty and it’s ready.

Products used in this art work:

Dusty Attic’s products used in this work:DA1538 – Distressed Grid StencilDA1487 – Sunburst StencilDA1760 – Leaves #3 StencilDA1413 – 300 x 300mm Chipboard Sheets 1.8mm


DA1573 – Notepad Edge Frames CircleDA2672 – Get Framed – Distressed Square


DA0351 – MusicDA1397 – Music Flourish #2


DA1628 – Tropical Foliage #1DA1001 – Lavender #1DA1839 – You Will Forever Be My AlwaysDA1669 – Bees


Thank you very much for visiting. If you have questions about any activity, let me know and I will be happy to answer. I cordially invite you to the next entry and best regards! Also check me out on IG or Fb. Have a nice day!
Ankarika Craft (Fb)Ankarika Craft (IG)
