
It’s that time of year again where we get to indulge ourselves making quirky and kooky Halloween creations!I used LOTS of Dusty Attic Chippy and other products to alter this Kmart paper mache pumpkin and turn it into a diorama!

The inside background was made with crackle paste and alcohol ink.
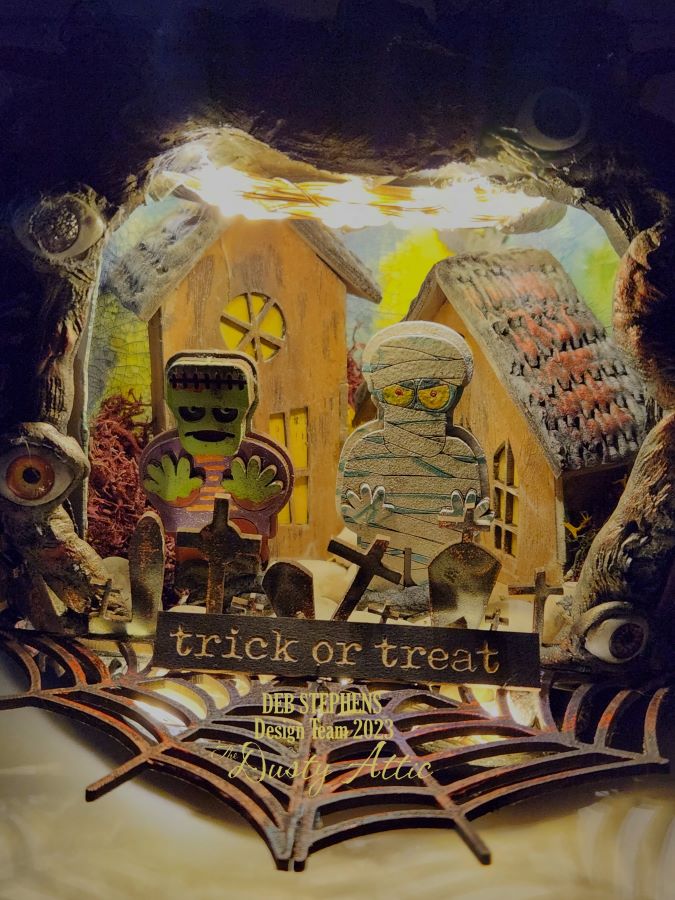
DA0178 Bats 8pk were painted black and stuck onto it. I also assembled DA3124Haunted House #1 and DA3125 Haunted House #2, painted and embellished the roof’s with black Quickcure clay, and dressed the windows. Glow in the dark paste was also applied.

But the Stars of this show are the DA 3101 – Halloweenies #1! They are just so cute! They stand behind the DA0615 Tombstone borders I used as a fence. I also used Quickcure clay to sculpt the “tree” that edges the cut section of the Pumpkin. I embedded creepy eyes into this too.

Lights were added inside the diorama and DA1865 Web corners were glued together to make the front decking. DA1790 Wordpl@y #6-black gave me my trick or treat signage. The lights are great to highlight the small space inside, but also to charge up the glow in the dark paste that was applied. This photo isn’t great, but it gives you the idea.

To dress the outside of the pumpkin, I cut the DA0183 Mini Bare Tree #2 in half and glued it to either side of the opening.

I ran the rest of the Tombstone Border chipboard around the back of the pumpkin.
I also stenciled texture paste through the DA3062 Spooky face stencil, and finished with Waxes.

I dressed the top of the pumpkin with DA1460 Ivy Flourish, Black roses, Skulls, pumpkins and Spooky Tule fabric.

This was a very fun project to make and there is a YouTube tutorial available on my Chanel, linked below, if you are interested in the process.
https://www.youtube.com/@DebsPalette
Below are a few more photos and a list of all the Dusty Attic Products I used.
Until next time, take care!


