Blog
Our everyday life – Heather McMahon
Hello and welcome back to Dusty Attic! It’s Heather McMahon with you today and this month I have made something VERY different for me! There’s no particular reason why this is so different – I just wanted to try something new.
Don’t you just love that flourish under the photo? I wanted to show it off so I cut my patterned paper to suit. Here’s how I decorated the flourish, the border and the title. It’s really easy but looks fabulous!
Step 1
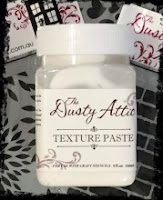
Add some Dusty Attic texture paste directly to the bare chippy with your finger. Dab it on roughly to create a stippled effect.
Step 2
Colour it with gold ink. This leaves you with a gorgeous textured piece plus the gold ink over the white texture paste creates a stunning pewter colour.
To make those flowers and leaves on the background, I simply applied the gold ink through a Dusty Attic stencil. I love the soft, airbrushed effect.
Here are the Dusty Attic products I used:
Texture Paste DA1218
Flower Burst Stencil DA1323
Ornamental Trim Set DA 1347
Lace Border #3 DA1344
Mini Captions #3 DA 1290
Foliage #3
Thanks so much for dropping in!
Happy scrappin’!
Heather McMahon
3 thoughts on “Our everyday life – Heather McMahon”
Comments are closed.


thnak's so much for the steps by steps, lovely page
Pitchoune
This is so pretty Heather 🙂
Beautiful LO Heather. Love the tips for the chippies and colors. Thanks for sharing!