Blog
Awesome – Belinda Spencer

Hello Dusty Attic fans!
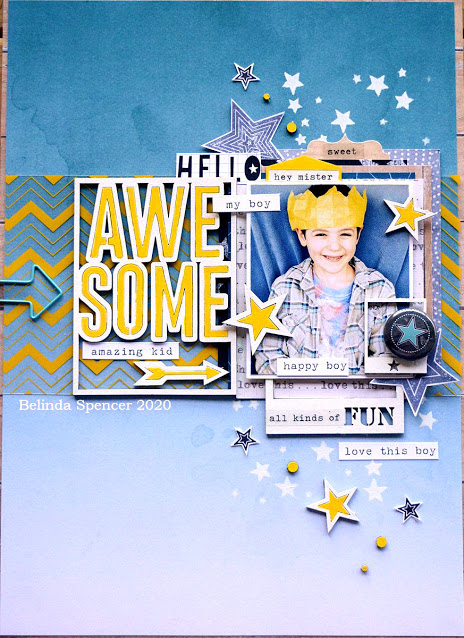
It’s Belinda here today to share my latest layout featuring awesome Dusty Attic chipboard.
Today I have a super fun boy layout to share with you.
‘AWESOME’ LAYOUT
For this layout, I began by painting all of the chipboard with heavy white gesso. You can see the gesso I use in the photo below but any gesso will do. I usually need about three coats of this gesso to get the result that I like.

I wanted a pop of yellow on my page to match the yellow Christmas cracker hat that my son is wearing in the photo. So I grabbed a yellow Posca Paint Pen and coloured in parts of some of the chipboard. I ended up with a fairly haphazard result because I didn’t separate the pieces. If you want a more precise look then I would highly recommend separating the pieces first before adding the yellow and then sticking back together again. For me though, I live in an old farmhouse and am pretty used to a ‘rustic’ look for everything!

Oh and did you spy that ‘awesome’ title? That is a sneaky peek at something new that is coming soon!
I assembled my layout bits and pieces, adding in some stickers too. I finished up by adding in some Mini Dots painted with the gesso and yellow Posca Pen.
The Dusty Attic products used:


DA2455 Polaroid Frame Set # 2
Well that is all from me today. I hope you are feeling inspired to have a play with your Dusty Attic chipboard too. Make sure you pop back tomorrow for some more design team inspiration.
Thanks for stopping by.
CheersBelinda

